Step 1 – Download the report definition file
You will need to run a report definition file within SIMS to extract the required data. You can download the file and instructions here.
Alternatively:
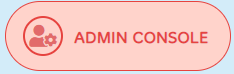
- Go to exampro.co.uk and log in with your administrator account, then click the Admin Console button in the menu on the left-hand side.
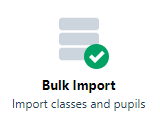
- Click the Bulk Import icon.
- Select SIMS IMPORT
- Click the Download our Report Definition File link.
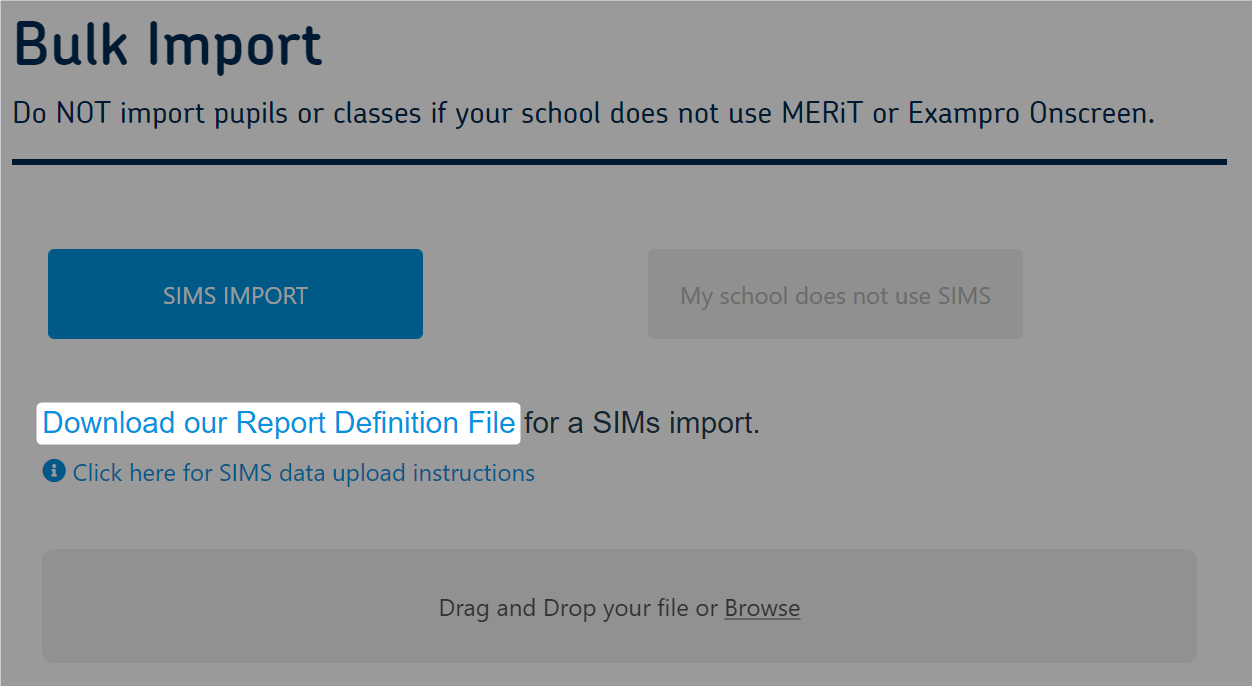
- Save the file to your computer (preferably the Desktop) and unzip it.
Step 2 – Extracting the data from SIMS
You should use the SIMS Data Manager account when following these instructions. This account will have the correct permissions to extract the required data.
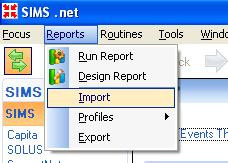
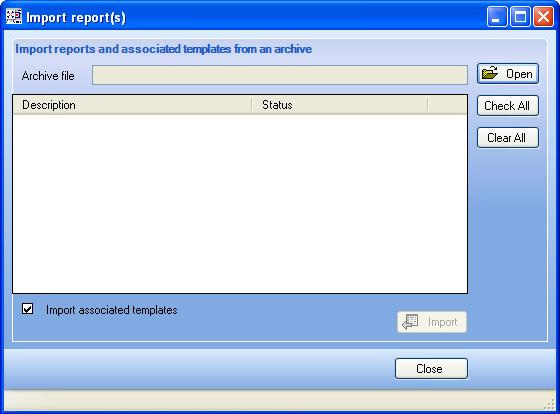
On your SIMS system select Reports > Import
Click Open at the top right of the Import report(s) screen.
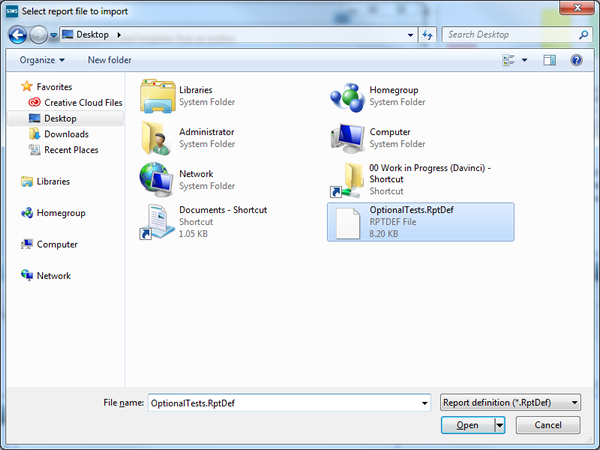
In the Select report file to import window, navigate to the Desktop and select the DoublestruckStudents.RptDef file.
Once selected, click Open.
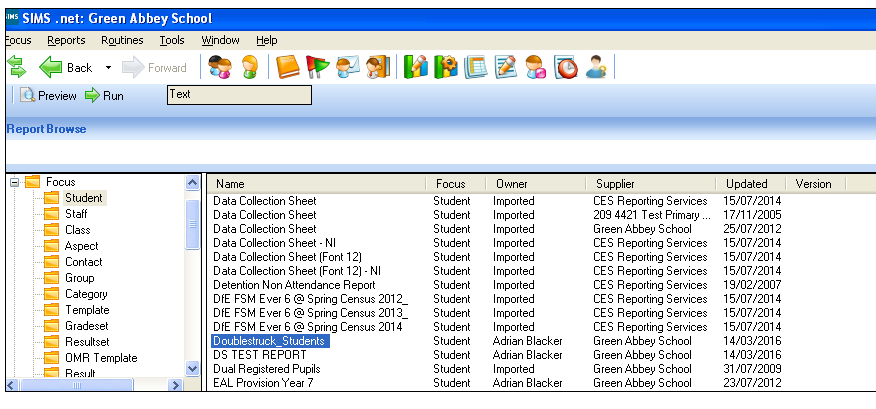
Ensure the Doublestruck_Students Report checkbox is selected.
Click Import.
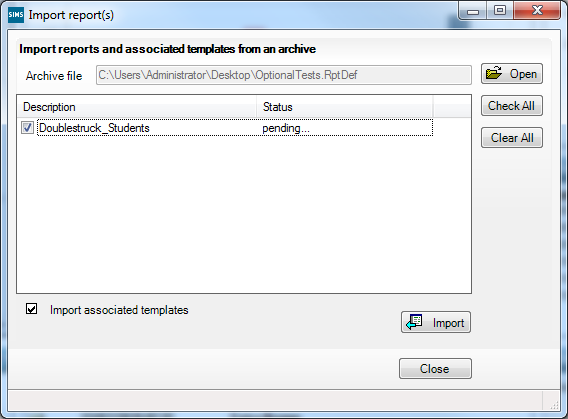
Once the status has changed from Pending… to Imported, close the Import report(s) screen by clicking Close.
Select Reports > Run Report from the main menu bar.
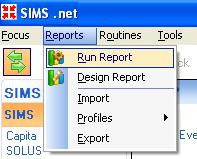
In the Report Browse window on the left-hand side, expand Focus and select Student.
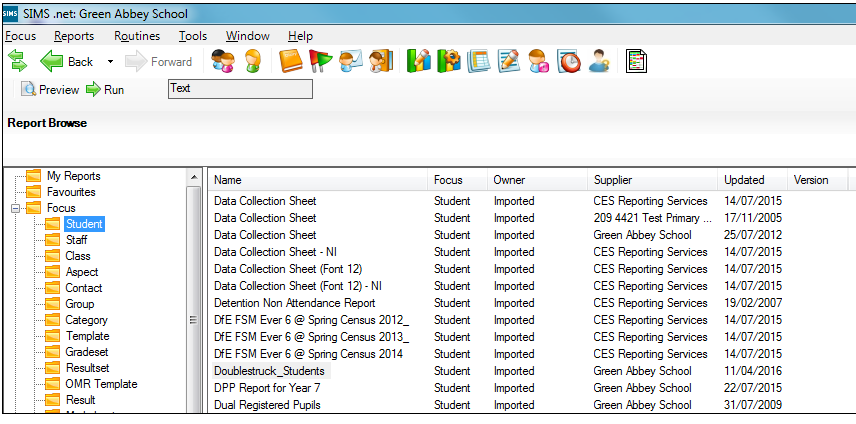
Find Doublestruck_Students in the list of reports. Select it and then click Run. The report will be generated for the whole school. This may take several minutes.
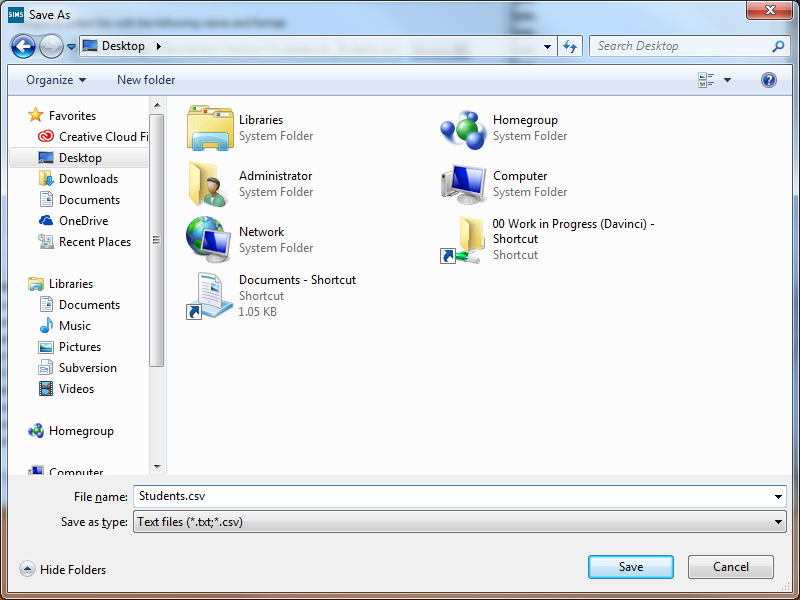
Click Browse in the resulting dialogue box to select where to save the report. Ensure that you have the rights to save documents into your chosen location.
NB Make sure you have added 'Doublestruck_Students.csv' to the end of your chosen path in the Filename field.
Ensure the Comma separated format selected.
Important: Ensure that the filename 'Doublestruck_Students.csv' has been added to the end of your selected path.
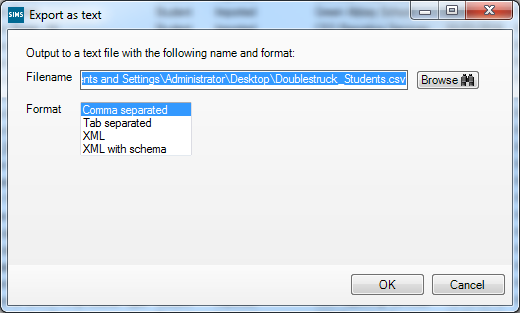
Click Save
You will then return to the Export as text screen
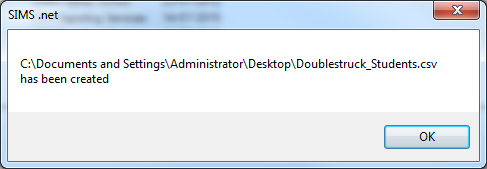
Select OK
When the report has been exported, a message will appear. Click OK.
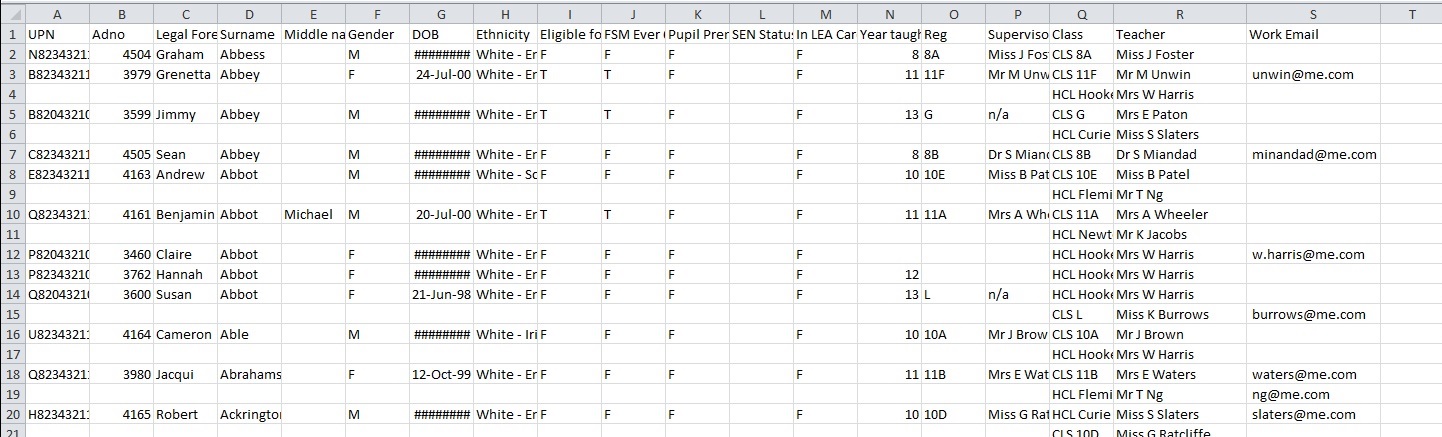
When the export is complete, your spreadsheet should look as follows and should be in CSV (comma delimited) format.
- You will have the option to select specific classes before you finalise the upload, see step 3 below. This saves you the trouble of filtering out irrelevant classes when exporting data from your school management system.
- Each student will be listed multiple times in the spreadsheet, once for each class they are in.
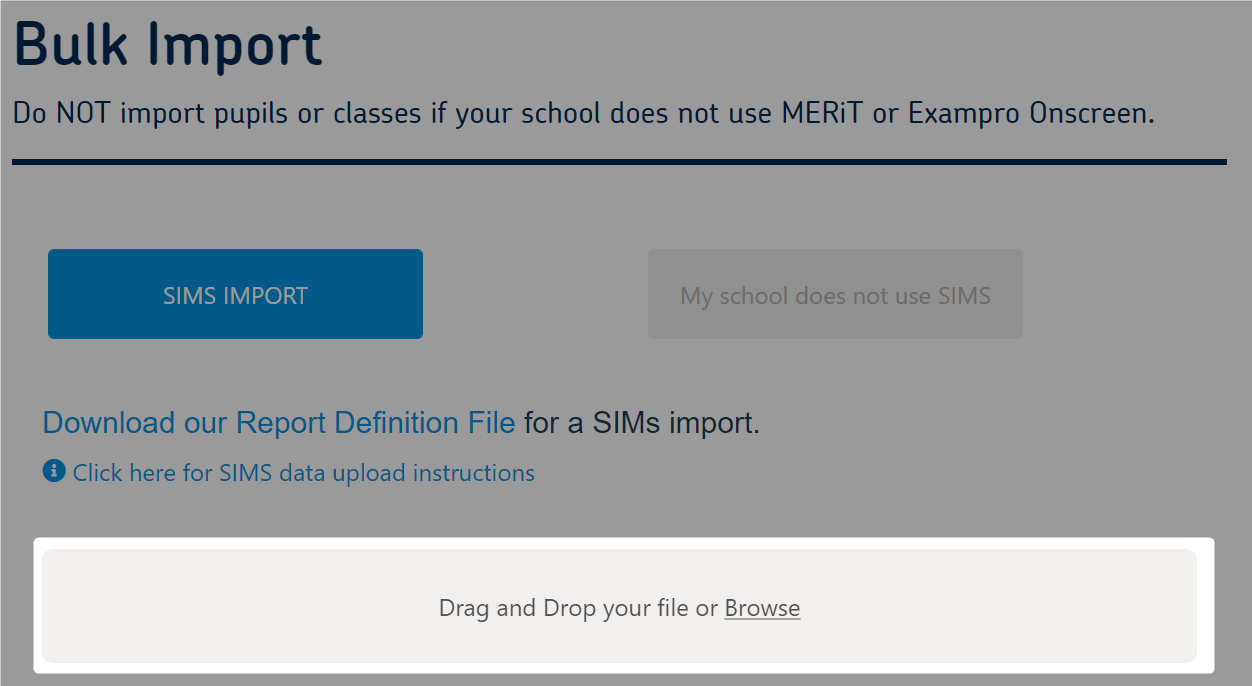
Step 3 – Uploading your data
Return to the Bulk Import section of the Admin Console using your administrator account.
Select SIMS IMPORT again, then either drag and drop your file into the space indicated or click Browse and select the file to upload it.
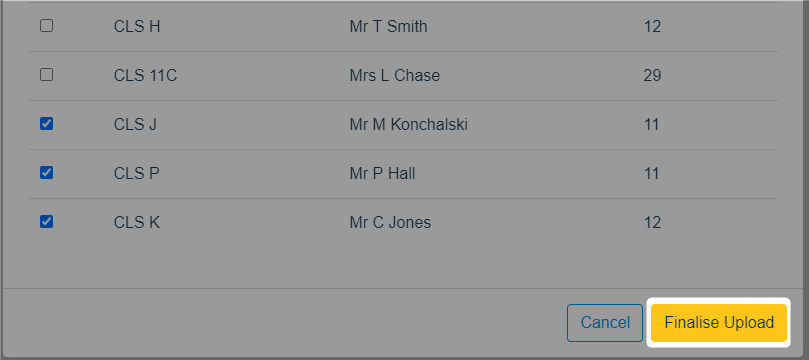
You will then be presented with a list of classes from your data set. You can choose those you wish to use. Data associated with any classes you do not select will not be stored by our system.
Use the filter list to locate specific classes.
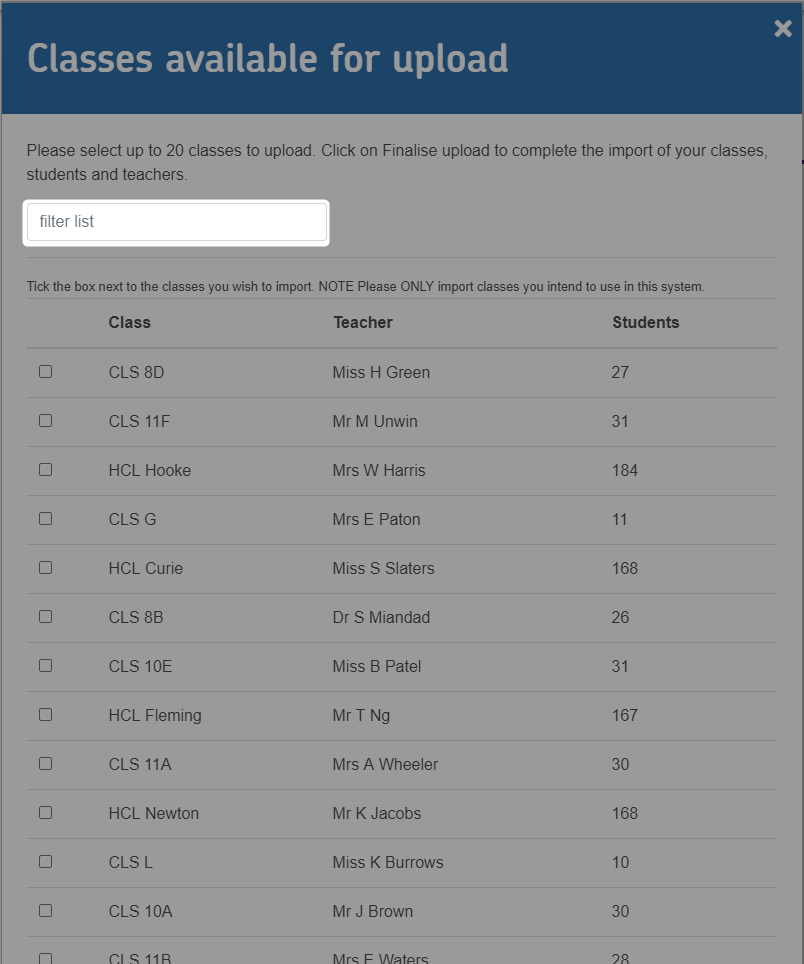
Once you have made your selections, click Finalise upload.
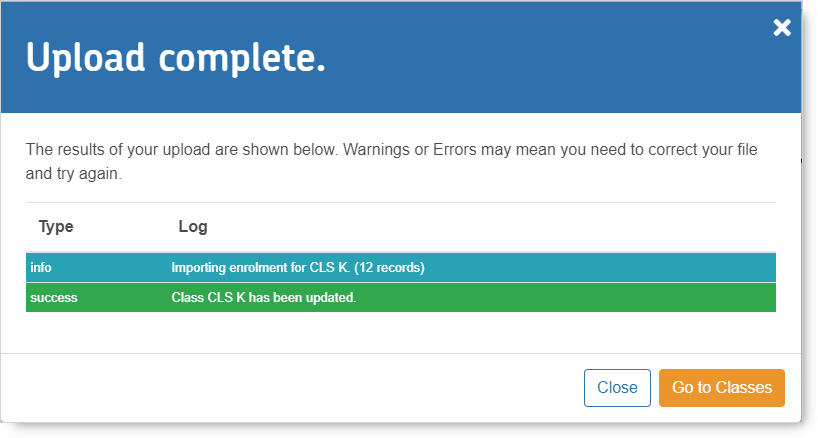
You will be presented with a summary of your import. It will show what data has been uploaded, how many accounts have been created, as well as any warnings or errors encountered.
| Column Title | Data | Required | Purpose |
| UPN | Universal Pupil Number | Mandatory | To uniquely identify the pupil |
| Adno | Admission Number | Mandatory | A fallback to identify the pupil |
| Legal Forename | Pupil Name | Mandatory | Used in reporting |
| Surname | Pupil Name | Mandatory | Used in reporting |
| Middle name(s) | Pupil Name | Optional | Used in reporting |
| Gender | Pupil Gender | Mandatory | Used in reporting |
| DOB | Pupil Date of Birth | Mandatory | A fallback to identify the pupil |
| Ethnicity | Pupil Ethnicity code | Optional | Used in reporting |
| Eligible for free meals | Pupil Eligibility for free meals | Optional | Used in reporting |
| FSM Ever 6 | Identifies pupils who have been eligible for free meals in the last six years | Optional | Used in reporting |
| Pupil Premium Indicator | Pupil Eligibility for pupil premium funding | Optional | Used in reporting |
| SEN Status | Identifies pupils with special educational needs | Optional | Used in reporting |
| In LEA Care | Identifies looked after children | Optional | Used in reporting |
| Year taught in Code | Pupil year group | Mandatory | Used to group the pupils by year group for reporting |
| Reg | Pupil registration group | Optional | Used to group pupils by registration group for reporting |
| Supervisor | Teacher name | Optional | Used to associate registration groups with teacher accounts |
| Class | Class name/code | Mandatory | Used to group pupils by class for reporting |
| Teacher | Teacher name | Mandatory | Used to associate classes with teacher accounts |
| Work Email | Teacher email | Optional | Used to deliver login credentials to teachers |